Prepping design files for print can seem daunting at first, but I promise it’s easier than it looks.
Have you ever sent something off to print just to receive something that didn’t meet your expectations? Me too. I think it’s safe to assume we’ve all been there.
The design and print worlds go hand-in-hand, but they each hold different nuances that make them unique. It’s important to make sure they’re both communicating efficiently and effectively.
I still get nervous every time I send something off for print, even though I’ve checked it seven times over. There’s nothing worse than getting something back and realizing there’s a typo or text has been cut off.
Here are 6 crucial things to keep in mind when designing for print.
1. Setting up Crop Marks and Bleeds
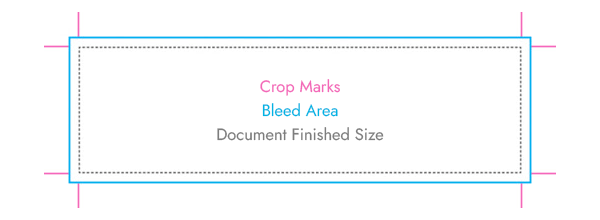
When creating a new document, setup your bleeds and crop marks.
Bleed is typically .125″ (or 1/8″) around your finished document, where the color/image extends past your finished document size.
This ensures that once your printed piece is trimmed to final size, there won’t be white slivers of paper running along the edges.
Next, crop marks are thin lines placed on the corners of your document. These lines show your printer where to trim your piece once it’s printed.
Additionally, make sure your crop marks are not in the bleed area. You want to make sure your crop marks are highly visible to ensure accurate trimming.
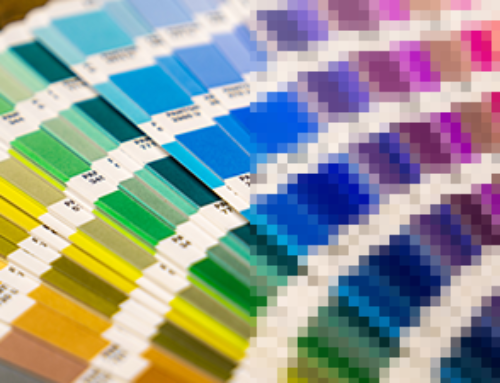
2. Correct Color Setup
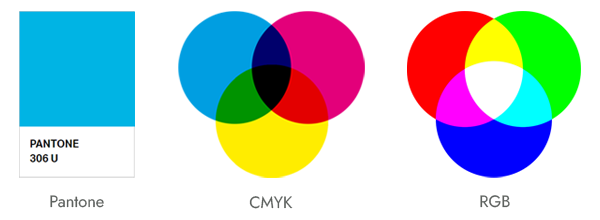
When setting up a file for print, you must be saved in CMYK format. Pantone/spot colors work just as well. On the other hand, RGB format is meant for digital files on the web.
Your printer can usually convert the colors for you but the results may not be what you desired.
Computer monitors don’t have universal color output. So, that blue on your screen may look brighter versus the blue on your coworker’s screen.
There is where Pantone/spot colors come in handy. This ensures that your colors are consistent throughout your design.
Furthermore, you’ll know exactly what color you’ll end up with once your design is printed. Pantone colors all universally use the same formula to maintain consistency.
3. Outline Fonts
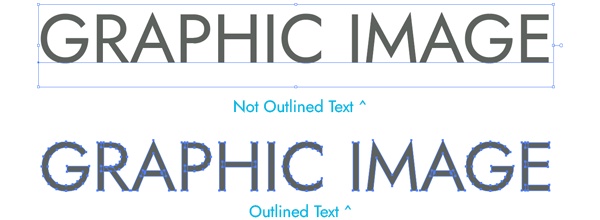
Outline all fonts once your design is finalized. Everyone works on a unique computer with different fonts installed. If your printer does not have your font, the typeface they see in the file will revert into something generic. Or, they’ll receive an error message and your text will turn into blocks such as: ▯▯▯
Converting your fonts to outlines ensures the type does not default to another font.
Outlining fonts turns them into vector files making the text no longer editable. This also ensures that text won’t get accidentally changed or deleted.
As a result, it’s an absolute must to keep two different copies of your design on hand. One copy before you convert your fonts to outlines that you’re free to edit, and one final copy with outlined fonts. Speaking from experience, it’s an awful feeling saving over a file you can no longer edit.
4. Link High Resolution Images
Improperly linked/embedded images won’t show up on your printer’s end. It’s the same concept as outlining all fonts.
A linked image is when Adobe Illustrator refers to an image file somewhere on your computer. That working file will no longer display the image once it is sent to another computer.
There are two ways to fix this.
One, send the image files to your printer along with the design file.
Two, embed all images within your design file.
This way, your printer won’t receive any image errors on their end. Thankfully, you won’t have to worry about doing this if you’re working in Adobe Photoshop.
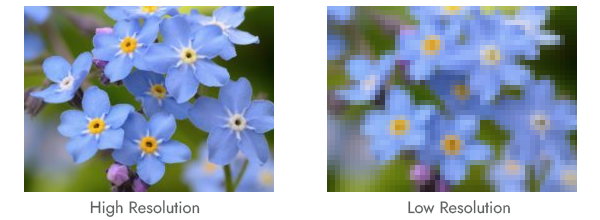
Additionally, ensure all images are at least 300dpi. DPI means dots per inch. Some people prefer the term PPI, or pixels per inch. When working on the web, 72dpi is the norm. But print resolution is more than double screen resolution.
Low resolution images will ruin any beautifully-designed piece. Just because it looks good on your screen doesn’t mean it’ll print that way. Low resolution images can be blurry, pixelated, or show noise.
At 300dpi, it squeezes the pixels close enough together to ensure they’re crisp and sharp once printed.
5. Check Spelling and Grammar
Checking your spelling and grammar is crucial. A single letter or punctuation mark out of place can crucify your brand. Typos and poor grammar result in people not taking your brand seriously.
After all, proper spelling and grammar show professionalism.
There’s something gutting about printing a design piece, looking at it, and realizing you have a typo. Even after checking it over obsessively, typos can still weasel by.
Staring at one design piece for hours is taxing. As a result, it can be easy to miss something when you’re so familiar with the content.
An easy way to remedy typos are to have fresh sets of eyes look at your design and read it over.
Before finalizing any project, send your file to multiple coworkers to check for any errors you may have missed. More often than not, you’ll be surprised for missing something so obvious.
6. Mailer Design
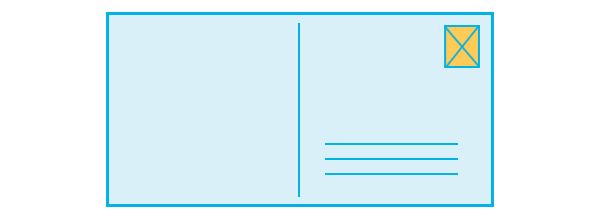
Now, this is something a little different and specific if you’re sending something out in the mail.
When designing a mailer, postcard or otherwise, be sure to leave enough space for the addressing. The United States Post Office requests a 4”wide x 2”height space for the address.
In addition, don’t forget to leave room for the postage indicia and be sure to include your return address on your mail piece.
Conclusion
Prepping your design files for print can seem intimidating at first if you aren’t too familiar with design programs and terms.
But once you break it down step-by-step, it becomes a lot more manageable.
When in doubt, always ask your printer for what they need you to do. They’ll appreciate the extra effort.
—
Have any questions or need further guidance on prepping your design file for print? You can email us at info@graphicimage.net or contact us here.